

Putting together a holiday tablescape can seem daunting to some, although it is a pivotal moment as a host! If you’re not sure about the best way to go about building a warm and inviting tablescape, follow these simple steps to get that “wow” reaction that you’ve always wanted from your guests.
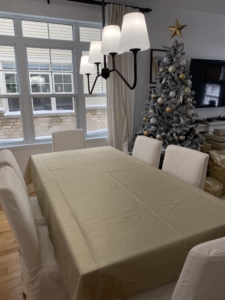
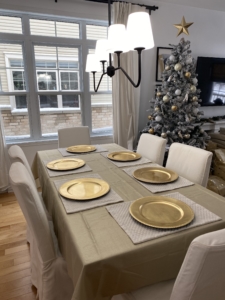
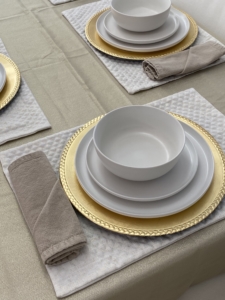
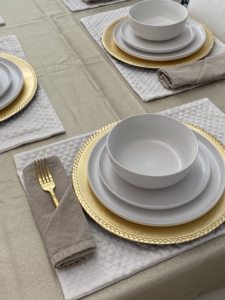
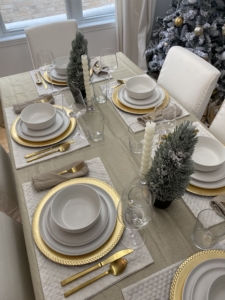
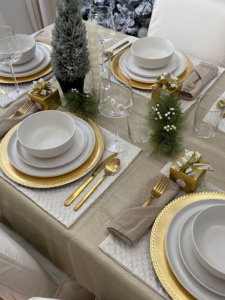
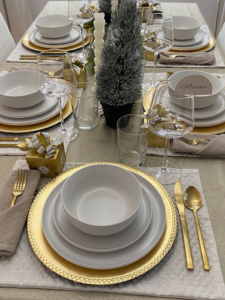
Step 1: The first step to creating a warm and layered tablescape is to start off with your first layer (aka a tablecloth). It’s best to stick to themes that match the rest of your home so in this case I went with beige, white and gold tones to keep everything cohesive looking.
Step 2: This next step is completely preference-based although if you’re looking to achieve a layered/textured look I would 100% suggest it. Add a placemat for each guest on top of the tablecloth to make each seat look more assigned and personal to each guest.

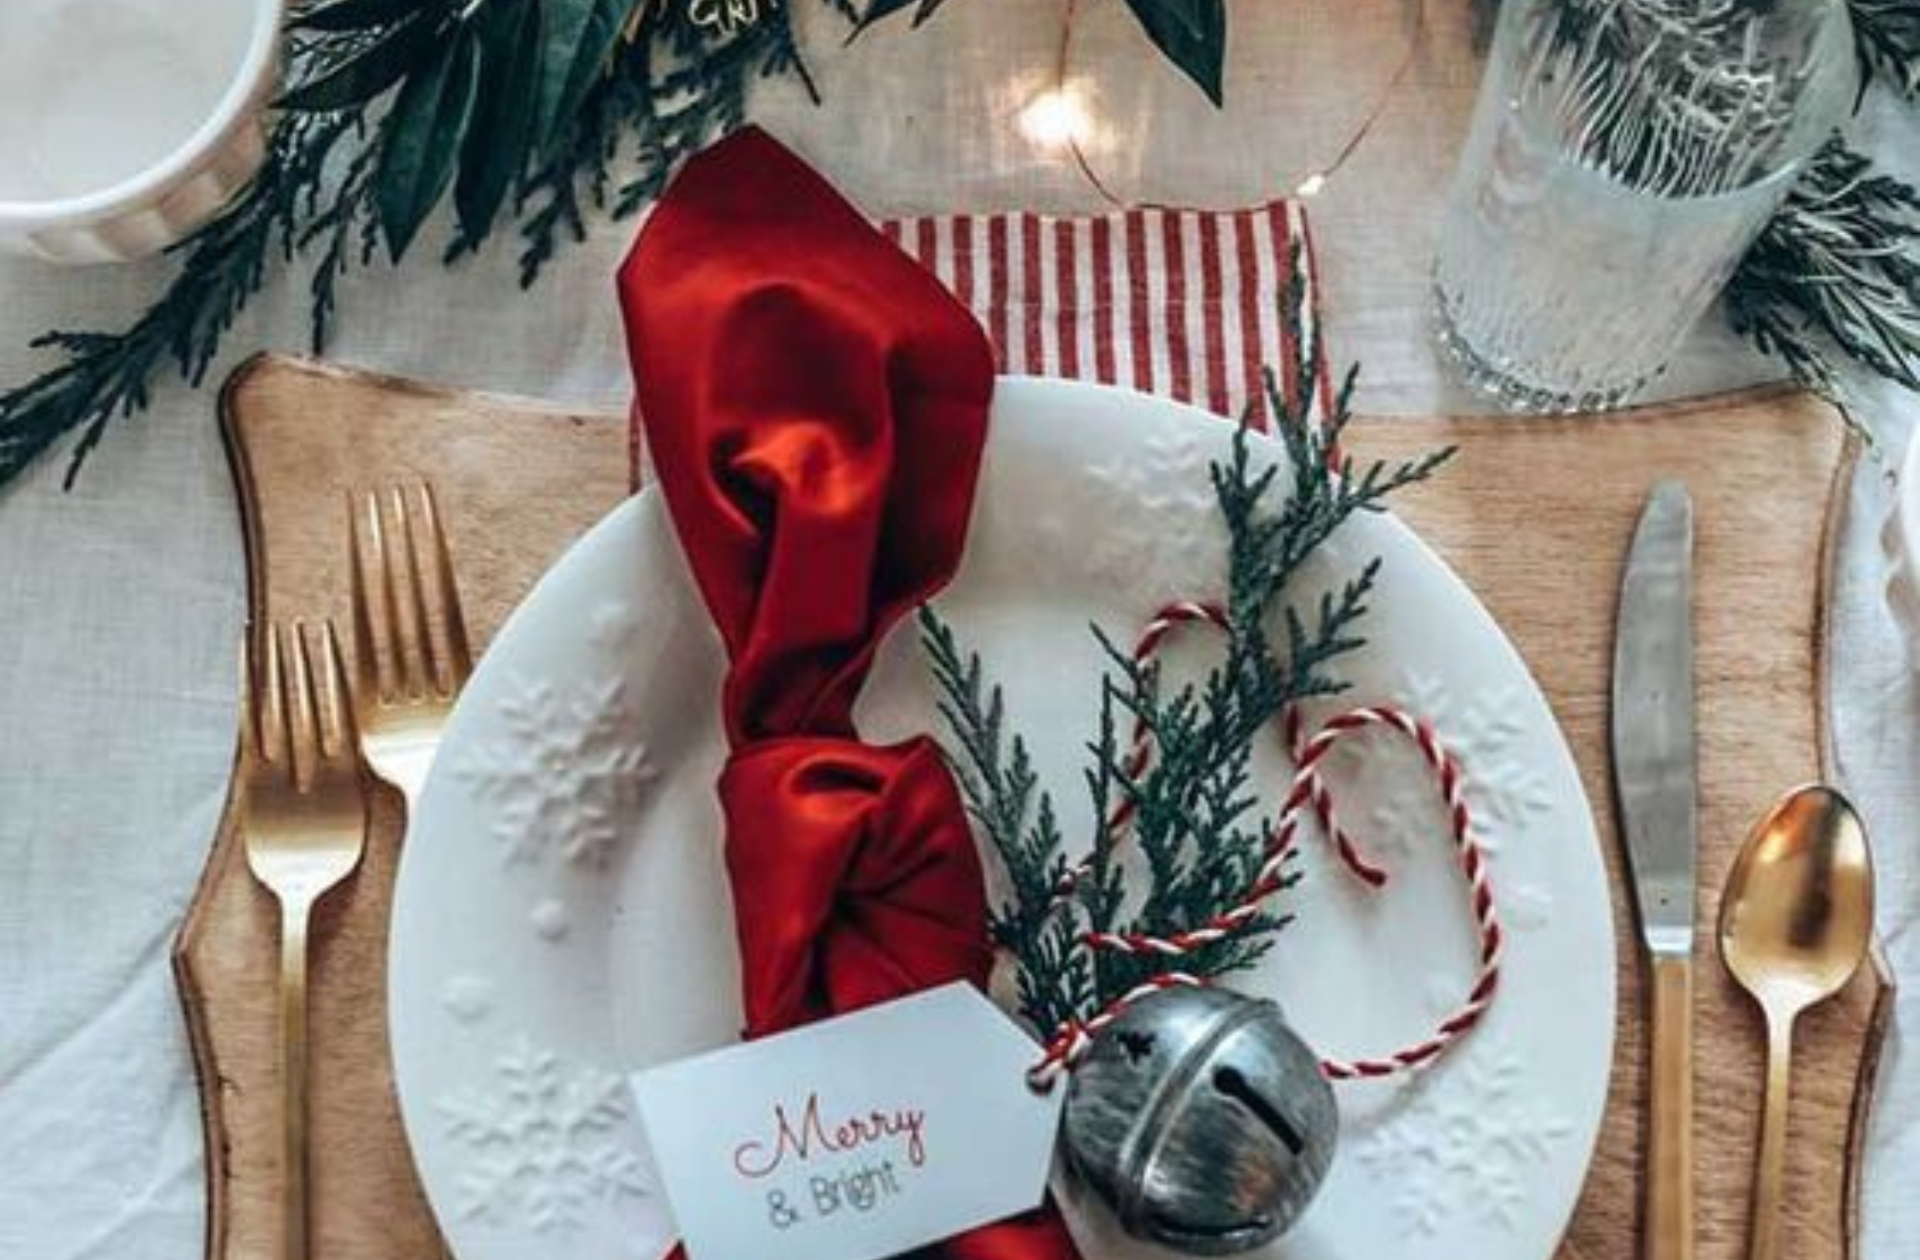
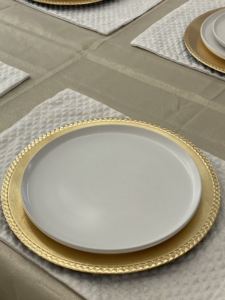
Step 3: Add a charger plate on top of each placemat. What is a charger plate you might ask? It is simply a decorative base setting on top of which other dinnerware is placed for a more formal look. They are a great touch to add during the holidays to make your tablescape more festive. You don’t have to spend a fortune on them either—the lovely ones pictured were found at the dollar store!
Step 4: Layer your dinnerware according to the meals that you are serving. Start off by placing your dinner plate on top of your charger plate.
Step 5: If you are serving salad, you may layer your salad plate on top of your dinner plate. If you are not, it is not necessary to set the table with salad plates—you can simply leave it to a dinner plate.

Step 6: If you are serving soup, the next step would be to add your soup bowl on top of your salad plate.

Step 7: Next up: napkins! Place your napkin to the left of the dinner plates. Dinner cloth napkins are great alternatives to paper napkins (and quite frankly more aesthetically pleasing). I like to make a pocket fold to easily insert my cutlery. You can watch a video on how to do so here.
Step 8: Place your dinner fork inside your napkin (or on top if you choose not to do a napkin fold).
Step 9: Place your dinner knife to the right of your dinner plate with the teeth facing inwards.

Step 10: Place your soup spoon to the right of your dinner knife.
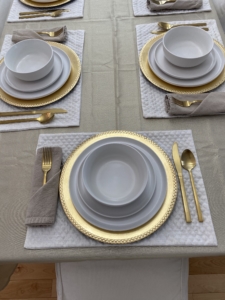
Step 11: Time for glassware! Place your wine glass at the top right of your placemat.

Step 12: Place your water glass to the left of your wine glass.

Step 13: Now for the fun part…decorating! It’s best to keep your tablescape simple so that it does not feel too crowded while trying to enjoy dinner with your guests.
I feel like the best way that I’ve learned over the years has been to place all of your dishes on the counter (buffet style) and either serve your guests or have them serve themselves. This way you do not need to worry about having enough space on the table for serving food.
I placed these faux mini Christmas trees on each end of the table, along with two tapered candles to set the mood. In the center of the table I also kept it minimal by adding these faux stems to match the mini trees. I would recommend using whatever you have around the house to make your tablescape seem authentic to you!
Step 14: Spice up your table! It’s always fun to add a little something special for your guests; these Dinner Dares are the perfect way to start conversations, make memories and most of all, laugh organically. You can get them at Anthropologie!

Step 15: It’s best to hide your cards so that your guests only look at them when you would like to start the game. I personally think the best time to start is during the dinner course.
Place the Dinner Dares underneath the guests’ dinner plates and ask them to look under their plates and read the dares aloud whenever you’re ready to start the game. Warning: there will be lots of laughter!

Step 16: Leave your guests with something special to take home. I added a box of Ferrero Rocher chocolates to each guest’s placemat to take home with them and thank them for being a guest! They will truly appreciate the small gesture and it will remind them of an awesome evening.
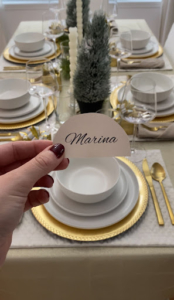
Step 17: Assign seating! This is a really helpful way to show your guests that the night ahead is organized. Place your name tags on a name tag holder if you own some, and if not, get creative! I created these name tags myself, printed them out and cut them into half circles.
I then proceeded to cut the half circles in the middle, right before the name in order to hook them onto each of my guests’ wine glasses. See the picture below for results!
Step 18: Voilà! Now you have a cohesive, layered and organized holiday tablescape!
Visit my TikTok for the full setup video. https://www.tiktok.com/@marinamichettiinteriors


 No products in the cart.